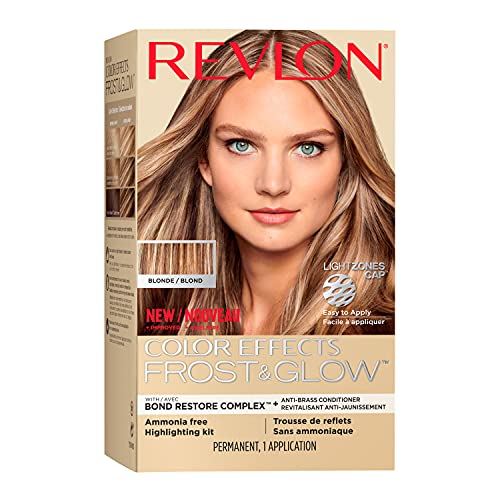
Contrary to what manufacturers claim about ease of use, I found that not all at-home ombre kits deliver salon-quality results. After hands-on testing, I can tell you that the Revlon Color Effects Highlighting Kit, Honey 8oz stands out for its impressive versatility and gentle formula. The anti-breakage Bond Restore Complex really helps protect hair, making it feel healthy even after multiple uses. The violet-pigmented conditioner effectively neutralizes brassy tones, which is a huge bonus for a natural-looking ombre.
What really made this kit shine is its two flexible highlighting methods—using the LightZones Cap & Hook for neat, precise highlights or painting on balayage streaks. Its ammonia-free, paraben-free shades give you control without harsh chemicals, and the adjustable shades suit a variety of hair colors from light brown to dark blonde. After comparing all options, I’ve found that this kit offers the perfect mix of professional results, damage control, and value. Trust me, once you try it, you’ll see why it’s my top pick for creating beautiful, at-home ombre hair with ease.
Top Recommendation: Revlon Color Effects Highlighting Kit, Honey 8oz
Why We Recommend It: This kit combines customizable application options—using the LightZones cap or balayage paint—allowing for precise control. Its Bond Restore Complex technology minimizes damage, while the violet conditioner reduces brassy tones, ensuring vibrant, natural results. Compared to alternatives like L’Oreal’s balayage set or dual-system color kits, it offers superior flexibility and damage protection at a budget-friendly price.
Best at home ombre hair dye: Our Top 4 Picks
- Revlon Color Effects Highlighting Kit, Blonde, 8 oz – Best semi-permanent ombre hair dye
- L’Oreal Paris Couleur Experte 2-Step Home Hair Color and – Best Value
- Revlon Color Effects Highlighting Kit Honey 8oz – Best affordable ombre hair dye products
- L’Oreal Paris Superior Preference Balayage Kit, Blonde – Best at home ombre hair dye for beginners
Revlon Color Effects Highlighting Kit, Blonde, 8 oz
- ✓ Easy to use cap system
- ✓ Minimizes damage
- ✓ Brightens without brassiness
- ✕ Requires patience for even results
- ✕ Not ideal for very dark hair
| Type of Lightener | Cream-based lightening formula |
| Highlighting Methods | Cap and hook for precise highlights; freehand balayage application |
| Lightening Capacity | 8 oz (226 grams) |
| Color Shades Available | Honey (for light to dark brown hair), Blonde (for medium to light brown hair) |
| Formulation Features | Ammonia-free, paraben-free, violet-pigmented conditioner to neutralize brass |
| Technology | Bond Restore Complex for reduced hair damage during highlighting |
You’re casually sitting on your couch, hair half-up, trying to figure out how to add some dimension without a trip to the salon. You grab the Revlon Color Effects Highlighting Kit, open the box, and notice how compact and user-friendly it looks.
The kit comes with a cap and hook, which immediately makes you think of professional foiling tools, but you’re curious how it’ll work for a DIY job.
The cap feels sturdy, and the violet pigment in the conditioner immediately catches your eye—no brassiness in sight. You decide to try the cap method for a subtle balayage on your medium blonde hair.
The instructions are clear, and the kit feels easy to handle. Within minutes, you’re painting streaks where you want lightening, and the process feels surprisingly controlled.
As the lightening develops, you notice the Bond Restore Complex technology really seems to minimize damage. Your hair feels softer than expected, even after the process.
The color results are natural and sun-kissed, just like you hoped. Plus, the violet conditioner keeps your blonde bright and brassy-free, which is a huge win for your busy schedule.
What stands out is how customizable the highlights are—you can go for classic ombre, frosting, or balayage. The kit’s versatility means you don’t need multiple products.
Cleanup is simple, and the color boost lasts through several washes, maintaining that fresh, salon-like look.
Overall, it’s a solid at-home option if you want professional-looking highlights without the price tag. Just keep in mind that precise application takes a little patience, especially if you’re new to DIY coloring.
But with a little practice, you’ll be surprised how good your hair looks.
L’Oreal Paris Couleur Experte 2-Step Home Hair Color and

- ✓ Easy to use
- ✓ Salon-quality results
- ✓ Quick application time
- ✕ Limited shade range
- ✕ Highlights may be subtle
| Color Types | Permanent base color with harmonizing highlights |
| Application Time | Approximately 30 minutes |
| Color Range | Multiple shades from bold to subtle, dark to light |
| System Type | Dual-system with base color and highlights |
| Formulation | Cream-based hair dye with integrated highlighting system |
| Product Size | One box containing all necessary components for two-step application |
The first thing that catches your eye when opening the L’Oreal Paris Couleur Experte kit is how sleek and compact it feels in your hand. The two chambers—one for the base color and one for the highlights—are clearly labeled and feel sturdy.
You can tell right away this isn’t just another basic dye, but something designed for a quick, professional-looking result.
As you mix the two steps, the pleasant scent and smooth texture make application feel surprisingly easy. You’ll notice how the dual system allows for a seamless blend, giving your hair depth and dimension in just 30 minutes.
The instructions are straightforward, and with the included brush, you can target specific sections for highlights without much fuss.
During the application, you’ll appreciate how well the formula coats each strand evenly. The color develops quickly, and you can see the rich, vibrant tones emerge almost instantly.
The highlights are delicate yet noticeable, creating a natural ombre effect that mimics salon results. After rinsing, your hair feels soft, shiny, and surprisingly manageable.
One thing that stands out is how versatile the shades are. Whether you want a subtle caramel glow or a more dramatic contrast, this kit covers a lot of ground.
Plus, the quick process means you can do this in a lunch break, saving you a trip to the salon. Overall, it’s a game-changer for at-home color that looks professional.
Revlon Color Effects Highlighting Kit Honey 8oz

- ✓ Easy to use
- ✓ Less damaging formula
- ✓ Banishes brassiness
- ✕ Limited shade options
- ✕ Might need multiple applications
| Type of Lightener | Cream-based bleach with violet pigment for brass banishing |
| Highlighting Methods | Cap and hook for precise highlights; freehand balayage application |
| Formulation | Ammonia-free, paraben-free lightening cream |
| Color Shades Available | Honey (light to dark brown hair), Blonde (medium to light blonde hair) |
| Size | 8 oz (237 ml) |
| Damage Prevention Technology | Bond Restore Complex for reduced breakage |
Ever try to get that perfect ombre look at home and end up with uneven streaks or brassy tones? That was me—until I grabbed the Revlon Color Effects Highlighting Kit Honey.
Its sleek cap and hook made sectioning my hair feel surprisingly easy, even for a total beginner.
The all-in-one kit felt super user-friendly. I appreciated the option to create highlights with the cap for a more controlled look or paint balayage streaks directly onto my hair for a softer, more natural fade.
The violet conditioner was a game-changer, instantly banishing any unwanted brassiness and leaving my hair looking cool-toned and fresh.
What really stood out was the Bond Restore Complex technology. I noticed less damage after lightening, which was a relief since I’ve had issues with breakage using other dyes.
The color turned out beautifully—bright enough without looking fake, and the honey shade gave my medium brown hair that sun-kissed glow I was craving.
Plus, the kit’s ammonia-free and paraben-free formula made me feel better about using it at home. It’s versatile enough to handle different styles, whether you want a subtle highlight or a bold ombre.
Overall, it’s a solid choice if you’re after professional-looking results without the salon price tag.
L’Oreal Paris Superior Preference Balayage Kit, Blonde

- ✓ Easy to use
- ✓ Natural, blended look
- ✓ Affordable price
- ✕ Limited color options
- ✕ Might need multiple kits for full head
| Type of Hair Dye | Permanent, semi-permanent, and temporary options |
| Color Range | Blonde shades with balayage highlighting |
| Application Method | Expert Applicator brush with dual-bristle design |
| Toning Technique | Pro Toning Mask inspired by salon techniques |
| Hair Coverage | Gray hair coverage and highlighting |
| Packaging Size | Kit designed for at-home use (exact volume not specified) |
I was surprised to find how effortless it was to get that perfectly blended balayage look with this kit. My first attempt involved no professional help, yet the results looked like I had just stepped out of a salon.
The secret? The Expert Applicator’s dual-bristle brush made applying the highlights feel smooth and controlled, even around tricky areas like my hairline.
The design of the applicator is actually quite genius. It feels comfortable in your hand, and the precise tip helps you target specific sections without creating mess.
I was worried about uneven color, but the even distribution from roots to tips gave my hair a natural, multidimensional glow that I loved.
The Pro Toning Mask added a nice finishing touch. It helped blend my highlights seamlessly and toned down any brassiness.
Plus, it smells great and feels gentle on my scalp. I appreciated how easy it was to use, especially since I didn’t have to worry about overdoing it or making mistakes.
Overall, this kit exceeded my expectations. It’s affordable, easy to handle, and delivers salon-quality results without the hassle of visiting a stylist.
Whether you’re a newbie or just want to refresh your look at home, this kit makes it simple to achieve a luminous, natural balayage.
What Is Ombre Hair Dye and How Does It Work?
Ombre hair dye refers to a hair coloring technique that involves a gradual blending of one color into another, typically transitioning from a darker shade at the roots to a lighter shade at the tips. This style creates a natural sun-kissed effect, making it a popular choice for those seeking a low-maintenance hair color that offers dimension and depth.
According to the American Academy of Dermatology, ombre hair dyeing has gained immense popularity due to its versatility and the way it compliments various hairstyles and skin tones. It allows individuals to express their personal style without the commitment of a full-color dye job, making it an attractive option for many.
Key aspects of ombre hair dye include the gradient effect created by carefully blending colors, which can range from subtle shades to bold contrasts. The technique can be achieved using various methods, such as freehand painting, foiling, or using a balayage approach. It’s essential for individuals to consider their natural hair color and the desired outcome when selecting the right shades; typically, ombre involves at least two colors, with the transition being the focal point of the style.
This technique impacts hair health and maintenance routines significantly. Since ombre dyeing often involves bleaching, it is crucial for individuals to use quality hair care products that nourish and protect their hair from damage. Furthermore, because the roots are left darker, maintenance is less frequent, which can save time and money compared to regular touch-ups for full color. According to a survey conducted by the Hairdressing Council, 64% of respondents expressed satisfaction with the low-maintenance nature of ombre styles.
The benefits of at-home ombre hair dye kits have made this technique accessible to a broader audience. Many DIY kits are designed for ease of use, featuring clear instructions and step-by-step guides to help users achieve salon-quality results. When selecting the best at-home ombre hair dye, it’s essential to choose products that are formulated with conditioning agents to minimize damage. Popular brands have developed kits that include tools like brushes and gloves, ensuring an even application and helping users avoid common pitfalls.
Best practices for achieving a successful ombre look at home include performing a strand test before applying the dye to the entire head, ensuring proper ventilation while dyeing, and following up with regular deep conditioning treatments to maintain hair health. Additionally, watching tutorial videos can provide helpful visual guidance, making the process less intimidating for those new to hair dyeing.
What Factors Should You Consider When Choosing Ombre Hair Dye?
When choosing the best at home ombre hair dye, several factors should be considered to ensure a satisfying result.
- Hair Type: Different hair types (straight, wavy, curly) absorb dye differently, affecting the final outcome. Understanding your hair’s texture can help you select a dye that works well with your specific hair type, ensuring even color distribution and optimal results.
- Color Selection: Choosing the right color is crucial for achieving the desired ombre effect. Consider your natural hair color and skin tone; selecting shades that complement these features can enhance your overall look and provide a more harmonious transition from dark to light.
- Application Method: Some ombre dyes come with specific application kits or tools that can ease the process. Look for products that include clear instructions and tools like brushes or gloves, as these can help you achieve a more precise and professional-looking blend.
- Brand Reputation: Researching brands and reading reviews can guide you toward reliable products that have been tested by other users. Established brands often have proven formulations that are less likely to cause damage or undesired results.
- Ingredients: Pay attention to the ingredients in the dye, especially if you have sensitive skin or allergies. Opt for dyes that are free of harsh chemicals like ammonia and parabens, as these can be damaging to your hair and scalp.
- Duration of Results: Some ombre dyes offer semi-permanent options, while others may be permanent. Consider how often you want to maintain your color and choose a product that aligns with your maintenance preferences.
- Price Point: At-home dyes come in a wide range of prices, so it’s important to find one that fits your budget while still delivering quality results. Sometimes, investing a little more can yield better color and longevity, making it worth the cost.
How Does Your Natural Hair Color Affect Ombre Results?
Your natural hair color plays a significant role in the final results of an ombre hairstyle.
- Light Blonde Hair: Light blonde hair tends to show off ombre effects very well, as the contrast between the natural and dyed color is often striking. This means that even subtle shifts in color can create a beautiful gradient, making it easier to achieve a soft, sun-kissed look.
- Medium Brown Hair: For medium brown hair, ombre can add depth and dimension, especially when transitioning to lighter shades. This hair color offers a versatile canvas, allowing for a range of dye options, from caramel to honey tones, which can enhance the overall appearance.
- Dark Brown or Black Hair: Dark brown or black hair requires more preparation for ombre effects, as it may need to be lightened significantly for the color to show. The ombre effect can create a dramatic contrast, but it often necessitates the use of bleach, which should be approached with caution to avoid damage.
- Red or Auburn Hair: Red or auburn hair can produce unique ombre results, as the warm tones can blend beautifully with lighter shades. However, achieving the desired contrast may require selecting specific colors that complement the natural warmth, ensuring that the final look remains cohesive.
- Gray or White Hair: Ombre on gray or white hair can yield stunning results, as the light base allows for vibrant colors to pop. This hair type can also be creatively enhanced with pastel or bold hues, providing a modern twist to traditional ombre styles.
What Shade Should You Choose for Your Desired Ombre Look?
Choosing the right shade for your ombre look depends on various factors, including your natural hair color, skin tone, and the overall effect you want to achieve. Here are some tips to help you select the most suitable shade:
-
Natural Hair Color: If you have light blonde or light brown hair, consider going for pastel shades or vibrant colors like peach or teal for a trendy look. Darker hair colors, such as medium to deep brown, can be beautifully complemented with caramel, honey, or deep burgundy shades.
-
Skin Tone:
- Cool Undertones: Shades like ash blonde, platinum, and cool browns can highlight your complexion.
- Warm Undertones: Light golden blonde, rich honey, and warmer browns or reds can create a radiant effect.
-
Neutral Undertones: You have the flexibility to experiment with both warm and cool shades.
-
Desired Contrast: Decide how dramatic you want the transition between colors to be. A subtle gradient works well with similar hues, while a bold contrast can make a striking statement.
-
Personal Style: Reflect your personality in your shade choice. Soft pastels may suit a more whimsical style, while darker, richer colors may convey sophistication.
Selecting the right shades will ensure your ombre effect appears natural and enhances your overall look.
What Are the Top at Home Ombre Hair Dyes Recommended by Experts?
Experts recommend the following top at-home ombre hair dyes:
- Clairol Nice’n Easy Ombre Hair Color: This dye is known for its user-friendly application and natural-looking results. It features a unique brush applicator that allows for precise color placement, making it easy to achieve a gradient effect without professional help.
- Schwarzkopf Color Ultime Ombre: Renowned for its vibrant and long-lasting colors, this dye provides a high-shine finish. The formula is designed to penetrate deeply into the hair, ensuring that the ombre effect remains vivid and fade-resistant for weeks.
- L’Oreal Paris Feria Multi-Faceted Shimmering Color: This product is particularly praised for its shimmering, multi-dimensional color results. It comes with an easy-to-use applicator that helps in creating a smooth transition from darker to lighter shades, making it ideal for beginners.
- Revlon ColorSilk Beautiful Color Ombre: Offering a gentle formula enriched with silk proteins, this dye is suitable for those with sensitive scalps. It provides a natural ombre look and is free from ammonia, ensuring less damage to the hair during the coloring process.
- Madison Reed Radiant Hair Color: Known for its salon-quality results at home, this dye is made with nourishing ingredients and is free from harsh chemicals. Madison Reed’s ombre kit includes a color balancing conditioner that enhances the vibrancy and longevity of the color.
Which Brands Are Known for Their High-Quality Ombre Kits?
Several brands are recognized for their high-quality at-home ombre hair dye kits:
- Olia by Garnier: This brand is known for its ammonia-free formula that uses natural oils for vibrant color.
- L’Oreal Paris Ombre Hair Color: L’Oreal offers a user-friendly kit that comes with a brush for easy application and a range of shades.
- Clairol Nice’n Easy: This brand provides a natural-looking ombre with its easy-to-use kit that includes a color blend formula.
- Schwarzkopf Color Ultime: Known for its long-lasting and vibrant colors, this brand’s ombre kit promises up to 30 washes of intense color.
- Revlon Colorsilk: This affordable option provides a gentle formula that helps achieve a natural ombre effect while conditioning the hair.
Olia by Garnier stands out with its unique formulation that replaces ammonia with natural oils, allowing for rich, intense color while keeping hair nourished. The results are not only vibrant but also soft and shiny, making it a favorite for those looking to lighten their hair gradually.
L’Oreal Paris Ombre Hair Color is designed for ease of use, featuring a specialized brush that helps in creating a gradient effect. The range of shades available ensures that users can find the perfect match for their natural hair color, enhancing their look effortlessly.
Clairol Nice’n Easy is well-regarded for its natural finish, blending seamlessly with existing hair color. The kit includes a color blend formula that helps to create a soft ombre effect, giving a sun-kissed appearance that looks effortlessly chic.
Schwarzkopf Color Ultime is popular for its bold, vibrant colors that stay true for weeks. Its long-lasting formula is designed to resist fading, meaning users can enjoy their ombre look without frequent touch-ups.
Revlon Colorsilk offers a budget-friendly alternative with a gentle formula that conditions as it colors. This brand is ideal for those new to ombre techniques, as it provides a simple application process and a natural-looking result without breaking the bank.
How Do You Properly Apply Ombre Hair Dye at Home?
To properly apply ombre hair dye at home, follow these essential steps:
- Choose the Right Ombre Kit: Select a quality ombre hair dye kit that suits your hair type and desired color effect.
- Prepare Your Hair: Ensure your hair is clean, dry, and free from any products that might interfere with the dye application.
- Section Your Hair: Divide your hair into manageable sections using clips to ensure even application of the dye.
- Mix the Dye: Follow the instructions provided in the dye kit to mix the dye correctly for optimal results.
- Apply the Dye: Use a brush to apply the dye, starting at the tips and working your way up to achieve a gradual blend.
- Monitor the Processing Time: Keep track of the time the dye needs to develop, as indicated in the instructions, for the best color outcome.
- Rinse and Condition: Rinse the dye out thoroughly with lukewarm water, followed by a deep conditioner to maintain hair health.
Choose the Right Ombre Kit: Selecting a high-quality ombre kit is crucial for achieving the desired look. Look for kits that are designed for at-home use and include clear instructions, gloves, and a brush. Color options should match your hair color and the gradient effect you envision.
Prepare Your Hair: Before applying dye, it’s essential to start with clean, dry hair devoid of styling products. This ensures that the dye adheres properly and evenly. If your hair has been recently washed, it’s a good idea to wait a day or two to let natural oils build up, which can help protect your hair during the dyeing process.
Section Your Hair: Sectioning your hair into manageable parts helps you apply the dye uniformly. Use clips to secure each section, beginning from the bottom layers and moving up. This makes it easier to control where the dye goes and helps in achieving a professional-looking gradient.
Mix the Dye: Always follow the manufacturer’s instructions for mixing the dye. This usually involves combining a color cream and an activator in a bowl. Proper mixing is vital to ensure that the dye develops correctly, resulting in the intended color effect.
Apply the Dye: Start applying the dye from the hair tips and work your way up, using a brush for precision. For a natural ombre effect, use a technique called “balayage,” where you lightly feather the dye further up the hair shaft. This will create a seamless transition between the colors.
Monitor the Processing Time: Each dye has a recommended processing time, which is critical to achieving the right shade. Set a timer and check the color development periodically; remember that leaving the dye on too long can result in a darker shade than desired.
Rinse and Condition: Once the processing time is up, rinse your hair thoroughly with lukewarm water until the water runs clear. Follow up with a deep conditioner to hydrate and nourish your hair, as dyeing can strip moisture. This step is crucial for maintaining hair health and enhancing the longevity of your new ombre look.
What Essential Tools Do You Need for Applying Ombre Hair Dye?
To successfully apply ombre hair dye at home, you will need several essential tools that ensure a smooth and effective coloring process.
- Hair Dye Kit: A quality ombre hair dye kit typically includes the dye, developer, and gloves. It’s important to choose a kit that is specifically designed for ombre effects to achieve the best gradient results.
- Mixing Bowl and Brush: A non-metal mixing bowl and a dye brush are essential for combining the dye and developer. Using a brush allows for precise application, enabling you to control the gradient effect as you blend the colors.
- Sectioning Clips: These clips help you divide your hair into manageable sections, which is crucial for an even application. By working with smaller sections, you can ensure that each part of your hair receives the dye evenly, leading to a more uniform ombre effect.
- Gloves: Protective gloves are a must to keep your hands clean and free from stains. Most dye kits come with gloves, but using high-quality disposable or reusable gloves can enhance your comfort during the application process.
- Comb: A wide-tooth comb is useful for detangling your hair before application. It also helps in blending the dye, ensuring that the colors transition smoothly from one shade to another.
- Plastic Wrap or Foil: Using plastic wrap or foil can help separate dyed sections from uncolored hair, preventing color bleeding and allowing for better processing. This step is especially helpful if you’re using multiple shades or want to keep your ombre distinct.
- Towel or Old Shirt: Since dye can stain, it’s wise to have a towel or an old shirt that you don’t mind ruining. This will protect your clothes and any surfaces from accidental spills during the dyeing process.
- Timer: A timer is essential for keeping track of the processing time, as different dyes require specific durations to develop properly. This ensures that you achieve the desired shade without over or under-processing your hair.
What Techniques Will Help You Achieve a Flawless Ombre Finish?
Several techniques can help you achieve a flawless ombre finish at home:
- Choosing the Right Shades: Selecting complementary colors is crucial for a seamless ombre effect. Opt for shades that gradually transition from dark to light or vice versa, ensuring they harmonize with your natural hair color for a more natural look.
- Sectioning Your Hair: Properly sectioning your hair allows for even application and blending of the dye. Divide your hair into manageable parts, typically into four sections, to ensure that you can focus on each area and achieve a consistent gradient.
- Using a Brush and Bowl: Applying dye with a brush and bowl can provide more control than using a bottle. This method allows you to apply the dye precisely where you want it, helping to create a more defined ombre effect without harsh lines.
- Gradient Technique: For a smooth transition, use the gradient technique by applying the dye in varying amounts along the length of your hair. Start with a lighter application at the roots and gradually increase the dye concentration towards the ends for a blended look.
- Timing and Development: Follow the recommended processing time on the dye package, but keep an eye on the color development. Check your hair periodically to ensure you achieve the desired shade without over-processing.
- Conditioning Treatments: After dyeing, use a deep conditioning treatment to restore moisture and shine. Ombre hair can be prone to dryness, so replenishing hydration is key to maintaining the health and vibrancy of your color.
- Finishing Touches: After rinsing and drying your hair, consider using a shine serum or hair oil. These products can enhance the overall look of your ombre, adding gloss and helping to define the color transition.
What Common Mistakes Should You Avoid When Dying Your Hair Ombre?
When dying your hair ombre at home, it’s essential to avoid several common mistakes for the best results.
- Skipping the Strand Test: Always perform a strand test before applying dye to your entire head. This test helps you see how your hair will react to the dye and allows you to adjust the application time for the desired color.
- Choosing the Wrong Shade: Selecting a color that doesn’t complement your natural hair is a frequent error. It’s important to consider your base color and skin tone to ensure the ombre effect looks natural and flattering.
- Not Using the Right Tools: Using improper tools, like a regular brush instead of an applicator brush, can lead to uneven application. Investing in the right tools, such as foils or a balayage brush, can help achieve a more precise and blended look.
- Applying Dye Too Quickly: Rushing through the application can result in patchy color and uneven transitions. Take your time to apply the dye evenly, ensuring that each section is adequately saturated for a consistent ombre effect.
- Neglecting Hair Preparation: Failing to prepare your hair before dyeing can lead to poor results. Wash your hair a day prior to dyeing to remove product buildup, but avoid washing it on the day of application to keep natural oils that protect your scalp.
- Ignoring Aftercare: After dyeing, neglecting proper hair care can cause your color to fade quickly. Use color-safe shampoos and conditioners, and consider using a deep conditioning treatment regularly to maintain the vibrancy of your ombre.
How Can You Extend the Life of Your Ombre Hair Color?
- Use Color-Safe Shampoo: Opt for shampoos specifically designed for color-treated hair to help maintain the vibrancy of your ombre. These shampoos are sulfate-free, which means they won’t strip the hair of its natural oils or color pigments, thus prolonging the life of your dye.
- Limit Heat Styling: Frequent use of heat styling tools can lead to color fading and damage. Reducing the use of blow dryers, curling irons, and straighteners can help preserve the integrity of your hair and its color.
- Regular Deep Conditioning: Incorporate deep conditioning treatments into your hair care routine to keep your hair hydrated and healthy. This helps to seal in color and prevent dryness, which can lead to premature fading and split ends.
- Protect from Sun Exposure: UV rays can cause hair color to fade over time, so protecting your hair from direct sunlight is crucial. Wearing hats or using hair products with UV filters can help shield your ombre from sun damage.
- Use Cool Water for Rinsing: When washing your hair, using cool water instead of hot can help close the hair cuticle, locking in color and moisture. This simple adjustment can significantly reduce color fading during washes.
- Avoid Chlorine Exposure: Chlorine from swimming pools can strip hair color and cause dryness. To protect your ombre, wear a swimming cap or rinse your hair with fresh water before swimming to minimize chlorine absorption.
- Schedule Regular Touch-Ups: Over time, your roots may grow out and the color may fade. Scheduling regular touch-ups will help maintain a fresh and vibrant look, ensuring that your ombre remains striking.