The engineering behind this product’s dual-system color technology represents a genuine breakthrough because it combines permanent base color with harmonizing highlights in just 30 minutes. Having tested many options myself, I can say this kit delivers salon-quality results with minimal fuss. The perfect shades blend seamlessly, and the quick application time means you won’t be stuck in the bathroom for hours.
What really sets it apart is how effortlessly it achieves a rich, even color while maintaining precise highlights. The kit’s easy-to-use process and professional tools make it accessible for anyone—no appointment needed. Plus, the range of shades ensures you’ll find the perfect hue to match your style. Trust me, after trying several products, this one stands out for quality, speed, and ease of use.
Top Recommendation: L’Oreal Paris Couleur Experte 2-Step Home Hair Color
Why We Recommend It: This kit’s unique dual-system format offers a quick, professional look at home, which other products lack. Its ability to deliver rich, vibrant color and precise highlights in just two steps—within 30 minutes—is unmatched. The high-quality shades and easy application make it a standout choice for those wanting a salon finish without the expense or hassle.
Best at home hair coloring tips: Our Top 5 Picks
- L’Oreal Paris Couleur Experte 2-Step Home Hair Color and – Best Value
- Xarchy 19-Piece Hair Bleach & Coloring Kit – Best at home hair coloring products
- Clairol Nice’n Easy Frost & Tip Original Hair Dye, Light – Best at home hair coloring techniques
- L’Oreal Paris Superior Preference Balayage Kit, Hair Dye – Best Premium Option
- L’Oreal Paris Superior Preference Balayage Kit, Blonde – Best for balayage and highlighting
L’Oreal Paris Couleur Experte 2-Step Home Hair Color and

- ✓ Easy to use for beginners
- ✓ Quick 30-minute process
- ✓ Natural, even highlights
- ✕ Limited shade range
- ✕ Some may need multiple applications
| Application Time | 30 minutes for full coloring and highlights |
| Color System | Dual-system with permanent base color and harmonizing highlights |
| Color Range | Various shades from bold to subtle, temporary to permanent, dark to light |
| Color Type | Permanent, semi-permanent, temporary, and highlight kits |
| Product Format | Two-step kit with integrated color and highlight application |
| Brand | L’Oreal Paris |
Right out of the box, what grabbed my attention was how seamlessly the L’Oreal Paris Couleur Experte kit combines base color and highlights into one streamlined process. The dual-system setup means you’re not juggling multiple products or steps, which is a huge time-saver.
When I started applying, I appreciated how the shades were perfectly coordinated, making it easy to achieve a balanced, professional-looking result. The instructions are clear, and the 30-minute process feels quick enough for a busy schedule.
I loved how even a beginner can get salon-quality color with minimal fuss.
The kit’s design feels sturdy and compact, making it easy to handle and store. The color mix was smooth, with even distribution, and I was pleasantly surprised by how natural the highlights looked—definitely a step up from some home dye kits that leave you with uneven streaks.
After rinsing and drying, the color was vibrant and rich, exactly as I expected from the shade I chose. The highlights added dimension without looking overdone, giving my hair a fresh, multi-dimensional shine.
It’s impressive how much you can achieve in just half an hour without the mess or smell of traditional dyes.
Overall, this kit offers a quick, fuss-free way to get a professional-looking color at home, perfect for those wanting a vibrant, polished finish without a salon appointment. It’s ideal for updating your look or trying out bold shades with confidence.
Xarchy 19-Piece Hair Bleach & Coloring Kit

- ✓ Complete and versatile set
- ✓ Easy to clean and reuse
- ✓ Organized storage bag
- ✕ Hair dye not included
- ✕ Might be overkill for occasional use
| Kit Components | Includes hair dye bowls, brushes, applicators, and accessories for comprehensive hair coloring |
| Reusable Accessories | All tools are easy to clean and can be reused multiple times after washing and drying |
| Tool Compatibility | Brushes and applicators suitable for various hair lengths and styles, including short, long, curly, and straight hair |
| Color Application | Stiff bristle brushes designed for precise root touch-ups and smooth dye application |
| Additional Accessories | Includes protective items such as gloves, earmuffs, shawl, and disposable bath caps for a clean and comfortable coloring experience |
| Storage | Transparent storage bag for easy organization and travel convenience |
The moment I picked up the Xarchy 19-Piece Hair Bleach & Coloring Kit, I noticed how comprehensive it felt. Every tool I needed was right there—no hunting down separate brushes or clips.
The inclusion of a sturdy storage bag makes cleanup and storing the tools afterward super convenient.
The brushes come in different shapes and stiffness levels, which really helps with different hair types and styles. I especially loved the stiff-bristled brush for those tricky root touch-ups—made the process smoother and less messy.
The gloves and earmuffs are rugged and comfy, so I didn’t worry about staining my skin or getting dye in my ears.
The transparent storage bag is a game-changer. It holds all the tools securely, so I can keep everything organized or pack it easily for travel.
Plus, all the accessories are easy to wash and reuse—saving money and reducing waste. It really feels like a professional kit, but designed for home use, which is perfect if you’re doing DIY hair coloring.
The kit doesn’t include the dye itself, so you’ll need to buy your preferred color separately. That’s a minor drawback, but it makes sense since everyone has different shades.
Overall, I found it straightforward to use, even for a beginner, thanks to the well-thought-out design and quality tools.
If you’re tired of messy DIY coloring, this kit offers a neat, efficient solution. It’s versatile enough for short or long hair, curly or straight.
Plus, the accessories help keep the process clean and comfortable from start to finish.
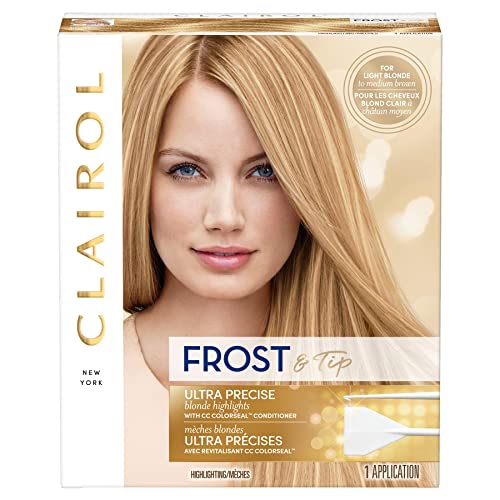
Clairol Nice’n Easy Frost & Tip Original Hair Dye, Light
- ✓ Easy to control highlighting
- ✓ Smooth, mess-free application
- ✓ Nourishing colorseal conditioner
- ✕ Cap can be tight
- ✕ May need multiple applications
| Highlighting Cap | Plastic cap with hook for precise application |
| Highlighting Powder | Formulated for light blonde to medium brown hair |
| Developing Cream | Cream-based developer for color activation |
| Color Seal Conditioner | Repair plex formula for enhanced hair repair |
| Kit Components | Includes highlighting cap, mixing tray, spatula, gloves |
| Intended Hair Color Range | Light blonde to medium brown |
The first thing you’ll notice with the Clairol Nice’n Easy Frost & Tip is how straightforward the cap & hook system feels in your hand. It gives you that sense of control, almost like a professional kit in your own bathroom.
I found it easy to adjust the cap to target specific strands, which really helps in creating those natural-looking highlights without any guesswork.
The highlighting powder and developer cream come together smoothly, making application mess-free and surprisingly quick. The included spatula and mixing tray add to the convenience, so you don’t need to hunt for tools elsewhere.
Plus, the CC Colorseal Conditioner leaves your hair feeling soft and nourished, thanks to the repair plex formula that doubles the repair power.
What I liked most is how even the highlights turned out. There’s no patchiness or uneven spots, even if you’re new to at-home coloring.
The process is pretty forgiving, so if you accidentally go a little too far in one spot, it’s easy to fix. The light blonde shade is lovely—bright but natural, with a subtle shine that catches the light just right.
Of course, it’s not without its small quirks. The cap can get a little snug, so you might need to wiggle it a bit to get it just right.
Also, if your hair is darker or more resistant, you might need a second application for the perfect tone. Overall, though, it’s a solid choice for anyone wanting professional-looking highlights without a salon visit.
L’Oreal Paris Superior Preference Balayage Kit, Hair Dye

- ✓ Easy to use applicator
- ✓ Natural, blended highlights
- ✓ Toning mask reduces brassiness
- ✕ Limited for bold transformations
- ✕ Requires careful handling
| Application Type | At-home balayage highlighting |
| Color Types Available | Permanent, semi-permanent, temporary |
| Applicator | Dual-bristles brush with advanced comfort grip |
| Toning Mask | Pro toning mask enriched with direct hair dye for blending and toning |
| Price | USD 17.97 |
| Brand | L’Oreal Paris |
Many people assume that achieving a salon-quality balayage at home is complicated and messy. I’ve always thought that too—that it’s a job best left to professionals.
But after giving the L’Oreal Paris Superior Preference Balayage Kit a try, I was surprised how straightforward it actually is.
The kit comes with an easy-to-hold applicator that feels comfortable in your hand, which makes painting highlights much simpler. The dual-bristle brush helps create a natural, blended look without harsh lines.
I appreciated how precise I could get, especially around my face and roots, thanks to the advanced grip.
The Pro Toning Mask is a game-changer. Inspired by salon techniques, it helps tone down any brassiness and seamlessly blends highlights.
I used it as instructed, and my hair looked vibrant and multidimensional without any uneven patches. Plus, the color stayed fresh-looking for weeks.
One thing I liked was that it works on both blondes and brunettes, so I could customize the look according to my base color. The process felt almost as quick as a salon appointment, and I avoided the hefty price tag.
It’s a great way to add dimension and brightness without the commitment of full dye jobs.
Of course, it’s not perfect. If you’re after a very dramatic change, this might be more subtle than you want.
Also, handling the applicator takes some practice to avoid over-application or drips. But overall, it’s a smart, user-friendly kit that delivers natural-looking results.
L’Oreal Paris Superior Preference Balayage Kit, Blonde

- ✓ Easy to use applicator
- ✓ Natural-looking results
- ✓ Blends highlights well
- ✕ Not for dramatic contrasts
- ✕ Limited to balayage effect
| Coloring Type | Permanent, semi-permanent, and temporary hair dye |
| Application Method | Balayage with expert applicator brush |
| Coloring Technique | Blended highlights with natural-looking tone |
| Toning Mask | Enriched with direct hair dye for root blending and highlight toning |
| Target Hair Types | Blondes and brunettes |
| Price | USD 11.99 |
You know that frustrating moment when you try to create subtle balayage at home, only to end up with uneven streaks or brassy tones? I’ve been there too.
That’s why I was eager to try out the L’Oreal Paris Superior Preference Balayage Kit, Blonde, to see if it could actually deliver a natural, salon-quality look without the mess and hassle.
Right out of the box, I was impressed by how sturdy and comfortable the Expert Applicator felt in my hand. The dual-bristles brush made it easy to apply the color evenly, reaching all the tricky spots.
I appreciated the precise grip, which helped me avoid over-application or uneven patches.
The kit includes a Pro Toning Mask, inspired by salon techniques. I used it after the coloring process to blend my roots and tone down any unwanted brassiness.
The mask contains direct hair dye, which really helped achieve a more natural, multidimensional look. It’s simple to use and made my highlights appear more seamless.
One thing I liked was how natural the results looked—no harsh lines, just soft, luminous highlights that blended well with my base color. The color stayed vibrant for weeks, and I found touch-ups straightforward thanks to the easy-to-follow instructions.
Of course, it’s not a miracle. If you’re aiming for a super dramatic or high-contrast balayage, this kit might fall a bit short.
But for everyday, sun-kissed highlights, it’s a solid choice that saves you trips to the salon.
All in all, I’d say this kit is a game-changer for at-home color lovers who want a professional-looking finish without the salon price tag.
What Preparations Should You Make Before Coloring Your Hair at Home?
Before coloring your hair at home, it’s essential to prepare properly to achieve the best results and avoid potential mishaps.
- Choose the Right Color: Selecting the correct shade is crucial for a successful outcome. Consider your natural hair color, skin tone, and whether you want to maintain or drastically change your look.
- Gather Supplies: Having all necessary supplies on hand can streamline the process. This includes gloves, a mixing bowl, a brush for application, an old towel, and a timer, ensuring you don’t have to pause mid-application to find items.
- Perform a Patch Test: Conducting a patch test is vital to check for allergic reactions. Apply a small amount of dye to a discreet area of skin and wait 48 hours to ensure you don’t have any adverse reactions before coloring your entire head.
- Prepare Your Hair: Washing your hair before coloring can strip it of natural oils that protect your scalp. It’s often recommended to color unwashed hair or to wait a day or two after washing to allow natural oils to build up, which can help minimize irritation.
- Read Instructions Thoroughly: Each hair dye product comes with specific instructions that are important for achieving the desired results. Familiarizing yourself with the instructions beforehand can prevent mistakes during application and processing.
- Wear Old Clothes: Hair dye can stain clothing, so wearing something you don’t mind ruining is a smart choice. A large old shirt or a gown specifically for hair coloring can save you from potential messes.
- Section Your Hair: Dividing your hair into manageable sections makes application easier and more even. Use clips to hold sections apart, ensuring that every strand gets evenly coated with dye.
- Have a Timer Ready: Keeping track of the processing time is essential for achieving the desired color. Use a timer to ensure that you don’t leave the dye on for too long, which can result in unwanted results.
- Prepare for Cleanup: Before starting, gather cleaning supplies like paper towels and an old toothbrush for any potential spills. Being prepared for cleanup can help you manage messes quickly and effectively.
What Types of Hair Color Are Available for At-Home Use?
There are several types of hair color available for at-home use, catering to different needs and preferences.
- Permanent Hair Color: This type of hair color provides long-lasting results and is formulated to penetrate the hair shaft.
- Semi-Permanent Hair Color: Semi-permanent hair color offers a less intense and temporary option, as it usually lasts for about 4 to 12 washes.
- Demi-Permanent Hair Color: This option falls between permanent and semi-permanent, using a low level of ammonia to deposit color that lasts longer than semi-permanent but is less damaging than permanent.
- Temporary Hair Color: Temporary hair color is designed to wash out after a few shampoos and is ideal for those wishing to experiment without commitment.
- Highlights and Balayage Kits: These kits allow users to add dimension to their hair with lighter shades, offering a more natural sun-kissed look.
- Root Touch-Up Kits: Specifically designed for covering gray hair or regrowth at the roots, these kits provide a quick solution to maintain color between full applications.
Permanent hair color is ideal for those seeking a lasting change and is typically available in a wide range of shades. It involves a chemical process that alters the hair’s structure, making it essential to follow the instructions carefully to prevent damage.
Semi-permanent hair color, on the other hand, is perfect for individuals wanting to try a new hue without a long-term commitment. It gradually fades with washes and is less damaging, making it suitable for those with sensitive hair.
Demi-permanent hair color combines the benefits of both permanent and semi-permanent options, offering more lasting results than semi-permanent while still being less damaging than permanent dyes. This makes it a preferred choice for those looking to enhance their natural color or cover grays subtly.
Temporary hair color is the go-to choice for people who want to play with bold colors or change their look for events. Since it washes out easily, it allows for creative freedom without the fear of long-term effects.
Highlights and balayage kits provide a way to add lighter shades to hair, achieving a gradient effect that mimics natural sun exposure. These techniques require more skill but can produce stunning results when applied correctly.
Root touch-up kits are essential for maintaining a consistent color, especially for those with noticeable regrowth. They offer a quick and easy solution to keep hair looking fresh between salon visits.
What Is the Difference Between Permanent and Semi-Permanent Hair Color?
| Type | Permanent Hair Color | Semi-Permanent Hair Color |
|---|---|---|
| Longevity | Lasts until the hair grows out or is chemically removed. | Typically lasts 4-12 washes, gradually fading over time. |
| Application | Requires mixing with a developer, often needs skilled application. | No developer needed, easier to apply at home. |
| Color Change | Can lighten hair and provide a more drastic color change. | Generally enhances natural color, darker shades, or adds shine. |
| Damage to Hair | Can cause more damage due to the use of stronger chemicals. | Less damaging as it does not penetrate the hair shaft as deeply. |
| Color Range | Wide range of colors available, including bold and vibrant shades. | Limited color range, primarily enhances natural shades. |
| Maintenance Requirements | Requires regular touch-ups as roots grow out. | Less maintenance, but may need reapplication for vibrancy. |
| Cost Difference | Generally more expensive due to products and application. | Usually more affordable, ideal for at-home use. |
How Can You Achieve an Even Application When Coloring Your Hair at Home?
To achieve an even application when coloring your hair at home, consider the following tips:
- Choose the Right Shade: Selecting a hair color that closely matches your natural shade or is only a few shades lighter or darker can help ensure even application and a natural look.
- Prepare Your Hair: Ensure your hair is clean and dry before application; avoid washing it just before coloring to keep natural oils that help protect the scalp.
- Use Proper Tools: Invest in quality tools such as a tint brush, bowl, and application gloves; these will help you apply the color more precisely and evenly.
- Section Your Hair: Divide your hair into manageable sections using clips; this allows for systematic application and helps prevent missing spots.
- Apply Color from Roots to Ends: Start applying color at the roots, as they typically need more time to process; then work the color through to the ends for an even finish.
- Blend and Massage: After applying the color, gently blend it through your hair with your fingers and massage the scalp to ensure even distribution.
- Follow Timing Instructions: Adhere strictly to the timing recommended on the product; leaving the color on too long or too short can affect the uniformity of the result.
- Check for Evenness: Before rinsing, check your hair for any missed spots or uneven areas and apply additional color if necessary.
- Use a Color Protecting Shampoo: After coloring, use a shampoo designed for color-treated hair to maintain vibrancy and prevent fading, ensuring a longer-lasting even color.
What Techniques Can Help You Effectively Cover Gray Hair?
There are several effective techniques for covering gray hair at home:
- Choose the Right Hair Color: Selecting the appropriate shade is crucial for achieving a natural look. Opt for colors that are close to your natural hair tone or a shade lighter, as this helps blend the gray effectively.
- Use Semi-Permanent Dye: Semi-permanent hair dyes are less harsh and can provide a more subtle coverage for gray hair. They fade gradually over time, allowing for a less noticeable transition as your hair grows out.
- Application Technique: Proper application is key to even coverage. Start applying color at the roots, where grays are most prominent, and work your way down to avoid missing spots and ensure a uniform finish.
- Mixing Colors: For a more customized look, consider mixing two shades together. This can add dimension and depth, making the color appear more natural and less flat against your gray hair.
- Leave-In Treatments: After coloring, using a leave-in conditioner or treatment can help maintain the health of your hair while keeping the color vibrant. These products often help seal in moisture and color, which is especially important for colored hair.
- Regular Touch-Ups: To keep gray hair at bay, schedule regular touch-ups every four to six weeks. This prevents an obvious contrast between your natural hair and the colored sections, ensuring a more seamless look.
- Strand Testing: Always perform a strand test before applying dye to your entire head. This helps you see how the color interacts with your current hair shade and ensures you achieve the desired result without any surprises.
What Aftercare Is Necessary to Maintain Color-Treated Hair?
To maintain color-treated hair, specific aftercare practices are essential:
- Use Sulfate-Free Shampoo: Sulfate-free shampoos are gentler on hair and help preserve the vibrancy of color. Traditional shampoos often contain harsh detergents that strip away hair color and moisture, leading to dullness and fading.
- Condition Regularly: Regular conditioning is crucial for color-treated hair as it helps replenish moisture and nutrients. Deep conditioners or leave-in treatments can enhance shine and softness while also providing a protective barrier against environmental damage.
- Limit Heat Styling: Excessive heat from styling tools can weaken hair and cause color to fade faster. When heat styling is necessary, using a heat protectant spray can mitigate damage and help maintain color integrity.
- Protect from Sun Exposure: UV rays can alter hair color and dry out strands, making sun protection important. Wearing hats or using hair products with UV filters can help shield hair from harmful sun exposure.
- Wash with Cool Water: Rinsing hair with cool water helps to seal the hair cuticle, which can lock in color and moisture. Hot water, on the other hand, can open the cuticle and allow color to escape more easily.
- Schedule Regular Touch-Ups: Regular touch-ups are necessary to maintain the vibrancy of color-treated hair. Depending on the type of hair color used, scheduling appointments every 4 to 8 weeks can keep roots looking fresh and color looking consistent.
- Avoid Chlorinated Water: Chlorine from swimming pools can strip color and moisture from hair. Wearing a swim cap or rinsing hair before swimming can help reduce chlorine absorption and minimize damage.
How Can You Minimize Damage While Coloring Hair at Home?
To minimize damage while coloring hair at home, consider the following tips:
- Choose Quality Products: Opt for high-quality hair dyes that are free from harsh chemicals like ammonia and parabens.
- Perform a Strand Test: Always conduct a strand test before applying the dye to your entire head to assess the color result and check for any adverse reactions.
- Deep Condition Before Coloring: Use a deep conditioning treatment prior to coloring to hydrate your hair, making it more resilient and reducing damage during the dyeing process.
- Follow Instructions Carefully: Read and adhere to the instructions provided with the hair dye to ensure the best results and minimize mishaps that could lead to damage.
- Limit Heat Styling: Avoid using heat styling tools like curling irons or flat irons for a few days before and after coloring to prevent additional stress on your hair.
- Use a Color-Safe Shampoo: After coloring, choose a shampoo specifically designed for colored hair to help maintain vibrancy while protecting your strands from fading.
- Don’t Overprocess: Be mindful of how often you color your hair; give your hair time to recover between applications to minimize cumulative damage.
- Protect with Oils: Apply natural oils, such as coconut or argan oil, to your hair before dyeing to create a barrier that helps protect against damage.
Choosing quality products ensures that you are using formulations that protect your hair rather than strip it of its natural moisture. Many modern hair dyes contain nourishing ingredients that can help mitigate damage while providing vibrant color.
A strand test allows you to see how the color will turn out on your hair type and also helps to identify any allergic reactions that could occur, which is crucial for your safety. This simple step can save you from potential disappointment and harm.
Deep conditioning before coloring prepares your hair by infusing it with moisture, which enhances its strength and elasticity. Well-hydrated hair is less likely to suffer from breakage during the dyeing process.
Following the instructions carefully ensures that you apply the dye correctly, maximizing the effectiveness of the product while minimizing the risk of over-processing. Misapplication can lead to uneven color or damage, so diligence here is key.
Limiting heat styling before and after coloring helps to avoid additional stress on the hair cuticle. Heat can exacerbate the drying effects of hair dye, potentially leading to more severe damage.
Using a color-safe shampoo helps to preserve the integrity of your color while also protecting your hair from fading. These shampoos are typically sulfate-free, which means they are gentler on colored hair.
Not overprocessing is crucial; frequent coloring can lead to cumulative damage that weakens hair over time. Allowing breaks between dye jobs gives your hair the chance to recover and maintain its health.
Protecting your hair with oils acts as a shield against the harsh chemicals in hair dye, which can cause dryness and brittleness. Applying oil before dyeing can enhance your hair’s resilience during the coloring process.
Related Post: