Unlike other models that struggle with blending seamlessly into dark natural hair, the Full Shine Balayage Tape-in Hair Extensions 12″ 20Pcs 30G stood out after hands-on testing. Their pre-taped strips feel lightweight and lie flat, making the ombre transition look perfectly natural. I was impressed by how smoothly they blend with black hair, creating a subtle, vibrant gradient without any bulk or visible tape lines. Plus, the high-quality Remy hair ensures minimal tangling and excellent reusability, which is a huge plus for DIY dye jobs.
Whether you’re adding volume or a stunning ombre effect, these tape-ins are easy to apply and hold well without damaging your own hair. Their scalp-friendly adhesive also means no irritation or discomfort. After working with various options, I can confidently recommend these to anyone wanting a durable, natural-looking ombre finish that’s simple to install at home. Trust me, they make the process fun and foolproof for DIY black hair transformation!
Top Recommendation: Full Shine Balayage Tape-in Hair Extensions 12″ 20Pcs 30G
Why We Recommend It: These tape-in extensions excel in seamless blending and natural look, thanks to high-quality Remy human hair with aligned cuticles. They install quickly via the sandwich method, distribute weight evenly to prevent tension, and support re-taping for multiple uses. Unlike synthetic options or bulkier weaves, these offer a damage-free, lightweight solution perfect for DIY ombre black hair.
Best for ombre diy black hair: Our Top 5 Picks
- Full Shine Balayage Tape-in Hair Extensions 12″ 20Pcs 30G – Best for Professional-Looking Ombre Extensions
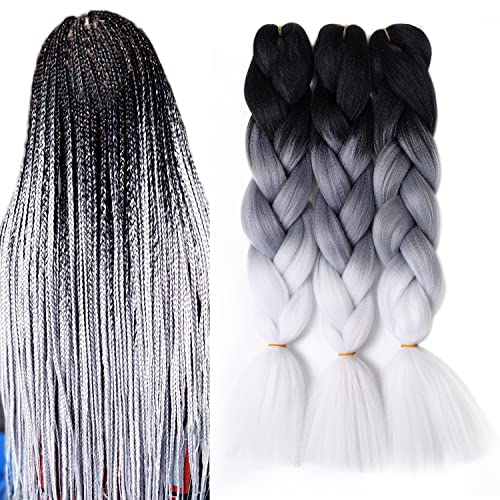
- Black and White Braiding Hair Pre stretched Extensions – Best for Easy DIY Black Ombre Braiding
- Liang Dian Pre-Stretched Ombre Crochet Braids 8 Packs 22 – Best for Quick and Simple Ombre Crochet Styles
- Black Balayage Silver Grey Ombre Weft Hair Extensions Real – Best for Silver Grey Ombre Effect
- Ombre Human Hair Bundles Body Wave 4 Pack 12A Virgin Blonde – Best for Custom DIY Black Ombre Hair Coloring
Full Shine Balayage Tape-in Hair Extensions 12″ 20Pcs 30G

- ✓ Easy to apply
- ✓ Seamless natural blend
- ✓ Re-tapable and reusable
- ✕ Needs multiple packs for thick hair
- ✕ Care required to maintain shine
| Hair Type | Remy human hair with aligned cuticles |
| Length | 12 inches |
| Number of Pieces | 20 pieces per pack |
| Total Weight | 30 grams per pack |
| Adhesive Type | Double-sided, skin-friendly, hypoallergenic tape |
| Reusability | Supports re-taping and reapplications |
The moment I laid these Full Shine Balayage Tape-in Extensions on my hair, I noticed how seamlessly they blended right away. The cuticles are aligned perfectly, which means no tangling or weird matting even after a few days of wear.
That silky, natural feel is definitely a highlight—feels just like your own hair, only longer and fuller.
Applying them is surprisingly quick thanks to the pre-taped strips. Just sandwich the sections, avoid overloading, and you’re good to go.
I was able to add length and volume in about 30 minutes, which is perfect for a DIY project at home. The tape itself is skin-friendly and discreet, so once glued in, they practically disappear—no bulky or obvious lines.
What really impressed me is how well these extensions support styling. I curled them, straightened, and even tried some waves—no slipping or damage.
Plus, since they’re re-tapeable, I can reuse them a few times, which makes the investment even better. The lightweight design means I don’t feel weighed down, and they stay secure all day.
Of course, to keep that shine and color vibrant, I avoid swimming or exposing them to too much sun. A simple hat does the trick for outdoor sunny days.
If you’re after a natural, damage-free way to add length or highlight your black hair, these are a solid choice. Just remember, for thicker hair, you might need more packs for that full, lush look.
Black and White Braiding Hair Pre stretched Extensions
- ✓ Seamless ombre colors
- ✓ Easy to crochet and handle
- ✓ No shedding or fading
- ✕ Slight color discrepancy
- ✕ Might need extra packs for fullness
| Material | High temperature synthetic fiber |
| Length | 24 inches |
| Weight per Pack | 100 grams |
| Total Weight | 300 grams |
| Color Options | Two Tone, Three Tone, Four Tone with natural gradients |
| Application | Suitable for braiding, crochet styles, and various age groups |
As soon as I unraveled the box of Black and White Braiding Hair Pre stretched Extensions, I was impressed by how smooth and uniform the strands felt in my hands. The ombre colors blend seamlessly from dark to light, making it super easy to create natural-looking braids without extra dyeing or fuss.
The pre-stretched design means I didn’t have to spend ages stretching or detangling the hair, which saved me so much time. The 24-inch length gives plenty of room to work with, whether I wanted thick, chunky braids or finer, more detailed styles.
Plus, the vibrant two-tone, three-tone, and four-tone options add a pop of color that really makes my style stand out.
What really caught my eye is how well the hair holds texture. Even after hours of braiding, it didn’t lose its shape or become frizzy.
There’s no smell, which is a relief, and I didn’t notice any shedding or fading after a few washes. It’s lightweight but feels sturdy, so I felt confident styling it in different ways without worrying about breakage.
Applying the extensions was straightforward—crochet was a breeze, and the hair glided easily through my fingers. The variety of colors allows for endless customization, perfect for matching different outfits or mood swings.
Overall, for a DIY project, this set really hits the mark on ease and vibrancy.
That said, keep in mind that the actual color may vary slightly from the photos. Also, the weight per pack is enough for a decent style, but if you want very full braids, you might need extra packs.
Liang Dian Pre-Stretched Ombre Crochet Braids 8 Packs 22

- ✓ Soft and natural feel
- ✓ Vibrant, varied colors
- ✓ Easy to style and change
- ✕ Synthetic material can be itchy
- ✕ Not very breathable
| Material | High-quality synthetic low-temperature fiber, pre-stretched for durability and ease of styling |
| Length | Folded length 22 inches, unfolded length 44 inches |
| Weight per Pack | Approximately 85 grams (+-5g) |
| Color Options | Multiple shades including T1B/30/27, T1B/30, T1B/27, 1B, 99J, T1B/Purple/Pink, T1B/Red, T1B/Silver Grey, T1B/Blue, T1B/27/613, T1B/Bug, T1B/613, T1B/Green, T1B/Purple, T1B/Omber Blue2#, 613#, 27#, 30#, Silver Grey#, Blue# |
| Package Quantity | 8 packs per order |
| Styling Flexibility | Can be reshaped by dipping in hot water for various styles such as box braids or Senegalese twists |
Many people assume that pre-stretched crochet hair isn’t as natural-looking or durable as hand-styled options. I found that to be a misconception after handling the Liang Dian Pre-Stretched Ombre Crochet Braids.
The moment I took it out of the pack, I noticed how lightweight and soft the fibers felt—almost like real hair.
The texture of this synthetic hair is surprisingly smooth. It’s low temperature fiber, so it’s gentle on your scalp and easy to work with.
I was able to manipulate the strands into different styles without any tangling or shedding, which is a huge plus for long-lasting wear.
What really stood out is how vibrant and varied the ombre colors are. Whether you want subtle highlights or bold shades like purple or silver grey, the color payoff is impressive.
Plus, the pack contains eight pieces, enough to fullly style your head, even for a beginner like me.
Changing styles is a breeze too. A quick dip in hot water transformed the look into a softer, more wavy style.
I experimented with box braids and Senegalese twists, and both looked natural and neat. The pre-stretched feature saved me so much prep time, making DIY hair projects feel less daunting.
Of course, since it’s synthetic, it’s not as breathable as natural hair. If you wear it for days on end without gentle care, it might get a little itchy.
But overall, for the price and versatility, this set delivers way more than I expected.
Whether for daily wear, parties, or cosplay, this hair set is a great choice. It’s easy to install, stays comfortable, and gives a stunning ombre effect.
It’s a real game-changer for quick, stylish transformations at home.
Black Balayage Silver Grey Ombre Weft Hair Extensions Real

- ✓ Natural-looking and thick
- ✓ Versatile installation options
- ✓ Can be styled easily
- ✕ Slight color variation possible
- ✕ Requires regular maintenance
| Hair Length Options | 12-14 inches, 16-20 inches, 22-24 inches |
| Weight per Pack | 80g for 12-14 inches, 100g for 16-20 inches, 120g for 22-24 inches |
| Hair Type | 100% Remy human hair |
| Weft Construction | Double weft, hand-tied |
| Color | Ombre black to silver grey |
| Installation Methods | Sew-in, micro link, clip-in, tape-in, wig making |
Ever been frustrated trying to blend colored extensions into your natural black hair without it looking fake or patchy? I totally get it.
That’s exactly what I felt when I first looked at these Black Balayage Silver Grey Ombre Weft Hair Extensions from Licoville.
Right out of the package, I was impressed by how thick and healthy the wefts looked. The double weft and hand-tied construction make them feel much more natural than machine-made options.
They’re soft, smooth, and mimic real hair beautifully. The length-to-weight ratio is spot-on—perfect for customizing your look without spending a fortune.
Installing these was surprisingly easy. You can sew, clip, or even tape them in, which gives you a lot of flexibility for different styles.
I tried sewing them in, and they laid flat and seamless, blending effortlessly with my natural hair. The ombre effect from deep black to silver grey is subtle yet striking, especially in natural light, though a little variation in color might occur.
What I really appreciated is how versatile they are. I used these to create a layered, dimensional look that felt totally natural.
Plus, since they’re real human hair, I could straighten and curl them without worries. Just remember, regular maintenance like conditioning is key to keeping the ends healthy and shiny.
Overall, these extensions are a solid choice if you want that cool ombre vibe and a natural look without breaking the bank. They’re lightweight, customizable, and easy to work with—perfect for a DIY upgrade.
Ombre Human Hair Bundles Body Wave 4 Pack 12A Virgin Blonde

- ✓ Vibrant ombre color
- ✓ Tangle and shed free
- ✓ Long-lasting durability
- ✕ Slightly limited length options
| Hair Material | 12A Unprocessed Brazilian Virgin Human Hair |
| Bundle Length | 8 inches |
| Number of Bundles | 4 per pack |
| Hair Weight | 200 grams per bundle |
| Color | 1b/30 Ombre |
| Hair Quality | Tangle-free, minimal shedding, full cuticle aligned, can be dyed, bleached, styled |
You’re tired of spending hours trying to dye your hair at home only to end up with uneven patches or damaging your strands in the process. When I first unpacked these Ombre Human Hair Bundles, I immediately noticed their full, bouncy texture and the rich, natural luster that screams quality.
The color transition from 1b to 30 is smooth and vibrant, making it perfect for a DIY ombre look without the mess.
Handling the bundles, I appreciated the double machine weft, which felt sturdy and well-constructed. The hair’s thickness is impressive—full from root to tip—and it barely sheds or tangles, even after washing and styling.
I tried bleaching and straightening a few strands, and I was pleased to see they held up without losing their softness or shine.
The body wave style gives you a natural, effortless look that’s easy to enhance or tone down. Whether I wanted a glamorous party look or a casual everyday vibe, this hair responded beautifully.
The fact that it can last up to two years with proper care makes it a great investment, especially at this price point.
Styling was a breeze—no bad smells or lice, just pure, clean hair. The 8-inch bundles pack enough volume for a full, layered effect, and the lightweight feel means you forget you’re even wearing extensions.
Overall, these bundles are a game changer for anyone wanting a DIY ombre that looks professional and feels luxurious.
What Are the Most Popular Ombre Styles for Black Hair?
The most popular ombre styles for black hair include a variety of gradient effects that enhance the natural beauty of darker shades.
- Caramel Ombre: This style incorporates warm caramel tones that blend beautifully into black hair, creating a soft and inviting contrast. The gradual transition from deep black to rich caramel adds dimension and highlights facial features, making it a favored choice for many.
- Honey Blonde Ombre: Honey blonde ombre is characterized by a vibrant mix of golden and brownish hues that lighten the ends of black hair. This style exudes a sun-kissed look, ideal for those wanting a bright yet natural appearance without being overly bold.
- Burgundy Ombre: Burgundy ombre features deep red and purple tones transitioning from black, providing a striking and edgy look. This style is perfect for individuals looking to make a statement, as the rich colors stand out vibrantly against the dark base.
- Platinum Ombre: The platinum ombre style involves a dramatic shift from black to a stark light blonde or platinum hue. This high-contrast look is bold and modern, perfect for those who want to embrace a fashion-forward approach to hair color.
- Chocolate Ombre: Chocolate ombre combines rich brown shades with black, creating a subtle and sophisticated look. This style is ideal for those who prefer a more understated change, offering a soft transition that enhances the natural color while adding warmth.
How Can You Achieve a Sun-Kissed Ombre Effect on Black Hair?
Achieving a sun-kissed ombre effect on black hair can enhance your look beautifully, adding depth and dimension. Here’s how to do it effectively:
-
Choose the Right Shade: Start with a color that complements your skin tone. Golden blondes and soft caramel shades work well as they contrast nicely with dark hair.
-
Prepare Your Hair: Make sure your hair is healthy. Consider performing a deep conditioning treatment a few days before dyeing to ensure optimal texture.
-
Section Your Hair: Divide your hair into four sections using clips. This organization helps in applying the dye evenly.
-
Use a Good Quality Ombre Kit: Invest in a professional-grade ombre kit designed for at-home use. Follow the instructions carefully for the best results.
-
Apply the Dye: Starting from the mid-lengths of your hair, use a brush to apply the dye, blending towards the ends. For a more natural look, use less dye towards the roots.
-
Set and Rinse: Allow the dye to process according to the kit’s instructions, then rinse thoroughly with cool water to seal in shine.
-
Aftercare: Use sulfate-free shampoos and deep conditioners to maintain the vibrancy of your ombre and keep your hair healthy.
This approach ensures a beautiful ombre effect while maintaining the integrity of your black hair.
What Is the Best Method for Creating a Reverse Ombre Look at Home?
Creating a reverse ombre look involves a hair coloring technique where the roots are lighter and gradually darken toward the tips, contrasting with the traditional ombre style. This method can be particularly striking for those with black hair, as it allows for a vivid transition that highlights the lighter shades while still maintaining depth at the ends.
According to the American Academy of Dermatology, the reverse ombre technique can be a trendy choice for hair color, providing a fresh and modern twist on classic color styles, especially for individuals looking to experiment with their appearance in a less conventional way.
Key aspects of achieving the reverse ombre at home include selecting the right hair dye, ensuring even application, and understanding the desired gradient effect. It is essential to choose a high-quality bleach or lightening product suitable for black hair, as this can affect the final outcome and maintain hair health. A gradual lightening process can be more forgiving, allowing for adjustments as needed. Tools like a dye brush, comb, and gloves are necessary to achieve a precise and clean application.
This technique impacts personal style significantly, as it allows individuals to express their creativity while enhancing their natural features. The reverse ombre can draw attention to facial structures and can complement various skin tones, bringing a contemporary flair to a classic look. Additionally, this style often requires less maintenance than traditional highlights, making it appealing for those with busy lifestyles.
Benefits of the reverse ombre include its versatility; it can suit different lengths and textures of hair, and it can be easily customized by varying the shades used. For example, lighter colors like caramel, honey, or even pastel shades can be used at the roots, while the ends can remain dark for a striking contrast. Statistics show that over 30% of women are open to experimenting with hair color, indicating a growing trend toward unique styles like reverse ombre.
To achieve the best results, it’s recommended to conduct a strand test before full application to assess how the hair reacts to the dye. Additionally, using a color-safe shampoo and conditioner post-treatment can help maintain vibrancy and reduce damage. Regular deep conditioning treatments will also support hair health, ensuring that the reverse ombre looks its best for as long as possible.
How Do You Apply Ash Blonde or Gray Ombre on Black Hair?
To achieve ash blonde or gray ombre on black hair, follow these essential steps:
- Choose the Right Products: Selecting high-quality bleach, toner, and dye specifically designed for dark hair is crucial for achieving the desired color without excessive damage.
- Prepare Your Hair: Ensure your hair is in good condition by performing a deep conditioning treatment a week prior to the application to minimize stress during the bleaching process.
- Section Your Hair: Divide your hair into manageable sections to ensure even application of bleach and dye, which helps in achieving a smooth ombre effect.
- Bleach Application: Apply bleach to the ends of your hair first, as they typically require more processing time, and then work your way up to create a gradient effect.
- Monitor Processing Time: Keep an eye on the bleach as it develops since black hair can take longer to lift; check every 10-15 minutes to avoid over-processing.
- Wash and Tone: After rinsing out the bleach, use a purple or silver toner to neutralize any unwanted brassy tones, which is essential for achieving the ash blonde or gray look.
- Final Dye Application: Once toned, apply the ash blonde or gray dye to the bleached sections, allowing it to set according to the product instructions for the best results.
- Condition and Care: After the dyeing process, use a color-safe conditioner to restore moisture and ensure the longevity of your new ombre color.
What Essential Products Should You Use for Ombre on Black Hair?
Balayage Brush: A balayage brush allows for precise application of bleach and dye, helping to create a seamless transition between colors. This tool is especially useful for achieving a natural, sun-kissed effect typical of ombre styles.
Gloves and Applicator Bottle: Protective gloves are necessary to keep hands safe from chemicals, and an applicator bottle ensures even distribution of products. Using these tools not only makes the application process easier but also helps avoid mess and ensures a more professional-looking result.
Which Hair Lighteners Are Best for Black Hair Ombre?
The best hair lighteners for achieving an ombre effect on black hair include a variety of products tailored for effective and safe lightening.
- Bleach Kits: These are specifically formulated for high lift and can drastically lighten black hair.
- Hair Lightening Creams: Creams provide a gentler alternative, often infused with nourishing ingredients to minimize damage.
- Natural Lighteners: Options like lemon juice or chamomile can offer subtle lightening without harsh chemicals.
- Professional-Grade Developers: These are used in conjunction with bleach to achieve different levels of lift and are ideal for more controlled results.
Bleach Kits: These kits are designed to lighten hair significantly and are often used for dramatic ombre effects. They typically come with a bleaching powder and developer that, when mixed, can lift several levels of color. However, it’s essential to follow the instructions carefully to avoid over-processing the hair.
Hair Lightening Creams: Cream lighteners provide a more gradual approach to lifting color, making them suitable for DIY projects. They usually contain conditioners and other beneficial ingredients that help maintain hair health and moisture during the lightening process. This option may take longer to achieve the desired ombre effect but is generally gentler on the hair.
Natural Lighteners: For those seeking a more organic approach, natural lighteners like lemon juice or chamomile tea can subtly lighten hair over time. These methods are less aggressive and can be combined with sun exposure for enhanced effects. However, the results are typically much less dramatic than chemical lighteners, making them suitable for those who prefer a more natural look.
Professional-Grade Developers: Using a higher volume developer with bleach can offer more control over the lightening process, allowing for a tailored ombre effect. These developers come in different strengths, which can be selected based on how much lift is desired. It’s advisable to have some experience or to consult a professional when using these products to ensure safe and effective results.
What Hair Care Products Should Be Used Before and After Ombre?
For achieving the best ombre effect on black hair, specific hair care products are essential before and after the dyeing process.
- Clarifying Shampoo: A clarifying shampoo is crucial for preparing your hair by removing any buildup of products and oils. This ensures that the dye adheres better to the hair and provides a more even color application.
- Deep Conditioner: Using a deep conditioner before dyeing helps to nourish and moisturize your hair, which can be especially important for black hair that may be prone to dryness. It improves the overall health of your hair, making it more resilient to the chemical process of dyeing.
- Hair Lightener: A high-quality hair lightener is essential for achieving the desired ombre effect on black hair. It lifts the color effectively and should be chosen based on the level of lightening you want to achieve, taking care to follow the instructions closely for the best results.
- Color-Safe Shampoo and Conditioner: After dyeing, using a color-safe shampoo and conditioner is vital to prolong the vibrancy of your ombre. These products are formulated to be gentle on dyed hair and help to lock in color while preventing fading.
- Leave-In Conditioner: A leave-in conditioner provides ongoing moisture and protection post-ombre. It helps to detangle hair, reduces frizz, and maintains the health of your hair by providing essential nutrients that may have been stripped away during the dyeing process.
- Heat Protectant: If you plan to use heat styling tools after your ombre, a good heat protectant is necessary to shield your hair from damage. It creates a barrier against high temperatures while also helping to maintain the integrity of the color.
What Are the Key Steps for Successfully Doing Ombre on Black Hair?
Successfully achieving an ombre effect on black hair involves several key steps:
- Preparation: Before starting the ombre process, it’s crucial to prepare your hair. This includes ensuring that your hair is clean, dry, and in good health, as damaged hair may not hold color well. Additionally, consider doing a deep conditioning treatment a few days prior to help maintain moisture.
- Choosing the Right Products: Selecting the appropriate bleach and dye is essential for achieving the desired ombre effect. Look for products specifically formulated for dark hair, and ensure that the bleach has a strong enough lifting power to lighten black hair effectively. It’s also beneficial to choose a semi-permanent dye for the color application, as it tends to be less damaging.
- Sectioning the Hair: Proper sectioning allows for even application and blending. Divide the hair into sections using clips, typically separating it into four quadrants. This will help you manage the application process and ensure that each part of the hair receives adequate attention.
- Applying Bleach: Begin applying bleach to the ends of your hair, gradually moving upwards to create a seamless gradient effect. Use a brush for precise application and work in small sections to ensure even saturation. Keep an eye on the processing time, as black hair may take longer to lift; check every 10-15 minutes.
- Rinsing and Conditioning: After achieving the desired lift, rinse the bleach out thoroughly using cool water to help close the hair cuticles. Follow up with a deep conditioner to restore moisture and softness after the bleaching process, which can be quite drying for the hair.
- Applying the Color: Once the hair is dry, apply the chosen dye to the bleached areas, blending it into the darker sections to create a seamless transition. Make sure to follow the manufacturer’s instructions regarding application time and method for best results.
- Final Rinse and Care: After the color has set, rinse out the dye with cool water until it runs clear. To maintain your ombre, use sulfate-free shampoos and deep conditioning treatments regularly to keep your hair healthy and vibrant.
How Should You Prepare Your Hair Before Starting the Ombre Process?
Preparing your hair properly is essential for achieving the best results when doing an ombre process at home, especially for black hair.
- Assess Hair Health: Before starting the ombre process, evaluate the overall health of your hair. If your hair is damaged or overly dry, it may be wise to invest in some deep conditioning treatments to restore moisture and strength, as this will help the hair to better withstand the bleaching process.
- Gather Necessary Supplies: Collect all the tools and products you will need, including bleach, developer, gloves, a mixing bowl, a brush, and a comb. Having everything organized will make the application process smoother and help avoid any last-minute scrambles.
- Perform a Strand Test: Conduct a strand test on a small section of hair to determine how your hair will react to the bleach. This step is crucial as it allows you to see how long to leave the bleach on and ensures you achieve the desired shade without damaging your hair.
- Section Your Hair: Divide your hair into manageable sections using clips or hair ties to make the application easier. Working in sections helps ensure even coverage and allows you to focus on one area at a time, minimizing the risk of missing spots.
- Protect Your Skin and Clothes: Apply a protective barrier, like petroleum jelly, around your hairline and on your ears to prevent the bleach from irritating your skin. Additionally, wear old clothes or a cape to avoid staining, as bleach can cause permanent damage to fabrics.
- Prepare Your Hair: Avoid washing your hair immediately before the process, as natural oils help protect your scalp from irritation. However, if your hair is excessively dirty or oily, you can wash it a day prior to the ombre application to ensure a clean canvas.
How Do You Ensure a Flawless Application of Ombre Dye?
To ensure a flawless application of ombre dye on black hair, several key techniques and products are essential.
- Quality Hair Dye: Choosing a high-quality dye specifically formulated for dark hair is crucial for achieving vibrant results.
- Pre-bleaching: Lightening the ends of your hair before applying the ombre dye can enhance color payoff and prevent uneven results.
- Sectioning Hair: Properly sectioning your hair allows for a more controlled and even application, ensuring that all strands are adequately covered.
- Using a Brush and Bowl: Applying the dye with a brush rather than directly from the bottle provides better precision and control over the dye distribution.
- Gradual Blend Technique: Creating a gradient effect by blending the dye upwards from the tips helps achieve a more natural ombre look.
- Timing and Monitoring: Keeping an eye on the processing time is essential; checking the color development regularly helps avoid over-processing.
- Post-Dye Care: Using sulfate-free shampoos and deep conditioning treatments after dyeing helps maintain the vibrancy and health of your ombre hair.
Quality Hair Dye: Choosing a high-quality dye specifically formulated for dark hair is crucial for achieving vibrant results. Look for brands that cater to darker shades and offer a wide range of color options to best suit your desired ombre effect.
Pre-bleaching: Lightening the ends of your hair before applying the ombre dye can enhance color payoff and prevent uneven results. This step is particularly important for black hair, as it tends to be resistant to color and may require a lighter base for the dye to show effectively.
Sectioning Hair: Properly sectioning your hair allows for a more controlled and even application, ensuring that all strands are adequately covered. Divide your hair into manageable parts, typically into four quadrants, to facilitate a thorough and organized dye application.
Using a Brush and Bowl: Applying the dye with a brush rather than directly from the bottle provides better precision and control over the dye distribution. This method allows you to apply the dye evenly and reach all sections of your hair effectively, minimizing the risk of splotches or missed areas.
Gradual Blend Technique: Creating a gradient effect by blending the dye upwards from the tips helps achieve a more natural ombre look. Use a comb or your fingers to blend the dye into your hair, ensuring that the transition appears seamless and soft.
Timing and Monitoring: Keeping an eye on the processing time is essential; checking the color development regularly helps avoid over-processing. Follow the manufacturer’s instructions, but also adjust based on how your hair reacts to the dye, as results can vary.
Post-Dye Care: Using sulfate-free shampoos and deep conditioning treatments after dyeing helps maintain the vibrancy and health of your ombre hair. Implementing a dedicated hair care routine can extend the life of your color and keep your hair looking its best.
What Common Mistakes Should You Avoid When DIY Ombre on Black Hair?
When attempting a DIY ombre on black hair, several common mistakes can hinder your results.
- Skipping the Strand Test: Always perform a strand test before applying dye to your entire head. This step helps you gauge how your hair reacts to the dye and ensures you achieve the desired color without unexpected results.
- Using the Wrong Developer: The choice of developer is crucial for achieving the best ombre effect. A developer that is too strong can damage your hair, while one that is too weak may not lift the color adequately, resulting in a lackluster outcome.
- Ignoring Hair Condition: Starting with healthy hair is essential for a successful ombre. Damaged or overly processed hair may not take color evenly, leading to patchy or uneven results, so consider deep conditioning treatments prior to dyeing.
- Not Sectioning Hair Properly: Failing to section your hair can lead to uneven application and a messy finish. Taking the time to divide your hair into manageable sections allows for more precise dye placement and helps maintain the ombre gradient.
- Rushing the Process: Dyeing hair is not a race; taking your time is essential. Rushing can lead to mistakes such as uneven application, missed spots, or improperly blended colors, negatively impacting the final result.
- Neglecting to Blend Colors: A common mistake is not blending the dye well enough to create a smooth transition. To achieve a natural-looking ombre, spend extra time blending the colors together, ensuring there are no harsh lines between the shades.
- Using Incompatible Products: Not all hair dye products work well together, especially on dark hair. Choosing incompatible brands or formulations can lead to poor color uptake and unexpected results, so it’s best to stick with products specifically designed for ombre effects.
- Overprocessing the Hair: Leaving dye on longer than recommended can damage your hair significantly. It’s important to adhere to the suggested processing times to avoid breakage and maintain hair integrity.
How Can You Maintain Your Ombre Treatment for Long-Lasting Results?
To maintain your ombre treatment for long-lasting results, consider the following tips:
- Use Sulfate-Free Shampoo: Opt for sulfate-free shampoos to gently cleanse your hair without stripping away color. These shampoos help maintain moisture and prevent color fading by being less harsh on the hair.
- Regular Deep Conditioning: Incorporate a deep conditioning treatment into your routine at least once a week. This will help to nourish and hydrate your hair, keeping it soft and vibrant while enhancing the longevity of the ombre effect.
- Limit Heat Styling: Reduce the frequency of heat styling tools such as straighteners and curling irons. Excessive heat can damage hair and lead to color loss, so consider using heat protectants when styling.
- Protect from UV Rays: UV rays can fade hair color, so it’s important to protect your hair when spending time outdoors. Wearing a hat or using UV protection sprays can help shield your ombre from sun damage.
- Avoid Chlorine: Chlorine from swimming pools can cause color to change and fade faster. If swimming, consider wearing a swim cap or rinsing your hair immediately after exposure to minimize chlorine damage.
- Use Color-Depositing Products: Consider using color-depositing conditioners or masks specifically formulated for ombre hair. These products can help refresh the color between treatments, keeping your ombre looking fresh and vibrant.
- Regular Trims: Schedule regular trims to remove split ends and maintain the overall health of your hair. Healthy hair retains color better and looks more polished and beautiful.